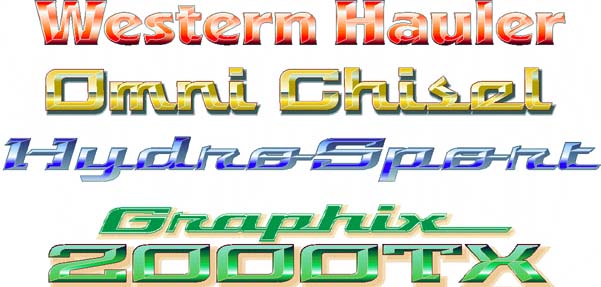
Working With Chiseled Fonts
These dimensional letters are known by other names, such as Prismatic
or Convexed. Chiseled Fonts from SIGNFONTS are separated into three fonts.
The primary or Base font that is the basic font. The Chiseled font that
gives it the dimension and the Regular version that combines the two into
one font.
THERE ARE SOME KNOWN ISSUES WITH MULTI
PART CHISEL FONTS AND SOME SIGN SOFTWARE. This is not just an issue with
Signfont Chisels, but with all Multipart Fonts. Signmakers using Signlab or Cassmate/Inspire may have problems
with multipart fonts matching up correctly. However, if you design in another
program such as CorelDRAW or Adobe Illustrator, simply convert all fonts
to curve before importing.
1. Using the Base Font, type in the word or phrase to be used in your
chisel font.

If you are going to make alterations such as kerning, stretching or
skewing, do it now. (Keep stretching and skewing to a minimum on most chisel
fonts, Omni is a little more forgiving.)
2. Make an exact copy and change the color.

3. Select both copies, center horizontally and vertically using the
align and distribute tool. In most programs this option is under the Arrange
Menu.

4.. Then select the top copy and change the font to the Chisel version.


Keep in mind that the base color should be the darker of the two. When
choosing a color scheme it is usually best to use monochrome, ie. gold
base with light yellow chisel, or dark blue base with light blue chisel.
Other design options include adding a darker or lighter outline to the
base portion, depending on the background color of your sign. You can also
try air brushing the vinyl for extra dimensional effects.

Some very beautiful and interesting things are possible using Chisel
Fonts and your design programs Fountain Fill Tool. This is a great option
for users of Large Format Printers. Another Design tip, use a white outline
on the chisel font and a dark outline on the base font.

